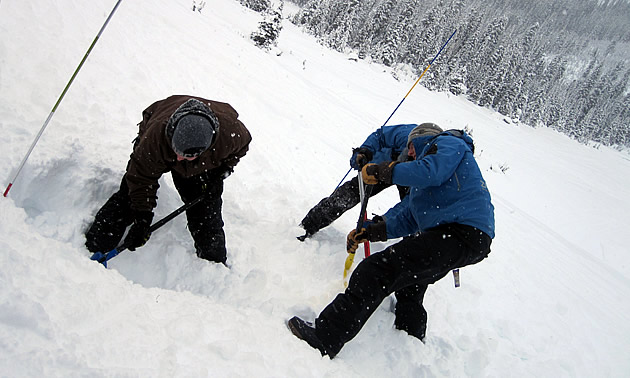
Hopefully, you’ve noticed the emphasis that Avalanche Skills Training (AST) and Companion Rescue Courses place on the technical skills of shovelling. This is because most transceivers have become user-friendly enough that instructors are able to spend less time in the field teaching basic search skills and they can reallocate their time to the demonstration and practice of vital shovelling techniques that save time and energy.
In recent years, trained shovelling teams have successfully rescued friends and family from burials as deep as three metres. There is no question that training and quality gear made the difference in these cases.
So here are some things to consider when it comes to digging out an avalanche victim:
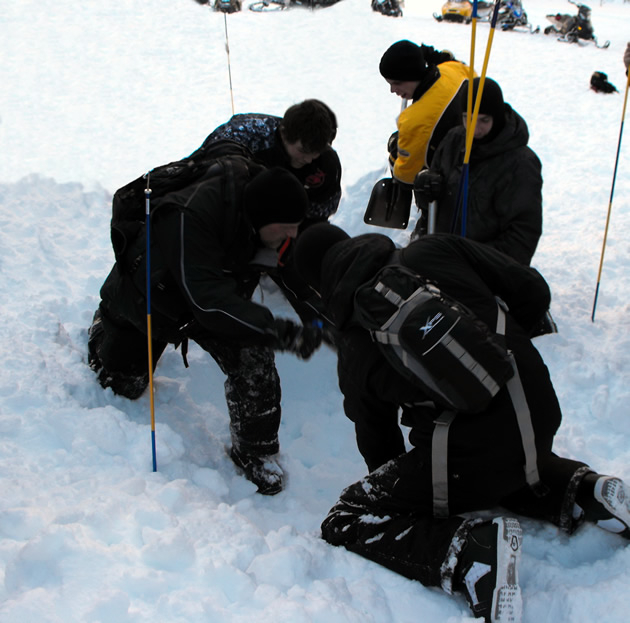
1. Where to start digging
Goal: Maximize the chance of survival for the buried person.
Challenge: It is natural for rescuers to concentrate their efforts directly at the probe when shovelling. This invariably leads to the rescuers shovelling in a circle and creating an unworkable cone-shaped hole. Rescuers may also cause an injury or worsen the patient’s injuries during the recovery and First Aid efforts.
Opportunity: Formal shovelling techniques position rescuers downhill from the probe strike. This lessens (but doesn’t fully control) the chance of standing on the buried person and striking them with the shovel. In addition, the final shape of the excavation allows for first aid to be performed in the hole, with minimum disturbance to the injured person, thus improving the avalanche victim's chance of survival.
2. The health and safety of rescuers
Goal: Maintain the health and safety of the entire group.
Challenge: Shovelling, speed and adrenalin can cause health concerns for the rescuers.
Opportunity: When managing a shovelling team, proper positioning, spacing and rest periods can help to avoid shovel injuries, exhaustion and dehydration, as well as short- and long-term strain to the heart, respiration and muscles.
3. Efficient snow excavation
Goal: Efficient excavation to minimize time and rescuer energy.
Challenge: Untrained rescuers often move more snow than what is necessary.
Opportunity: The goal is to get to the burial depth and then tunnel in. Conserve energy by learning to “paddle” snow down a ramp rather than lifting and throwing snow up steps or over your head. Lower the angle of the ramp if snow is rolling back into the hole. Switch positions and switch out shovellers frequently to use different muscle groups and give the body a chance to recover.
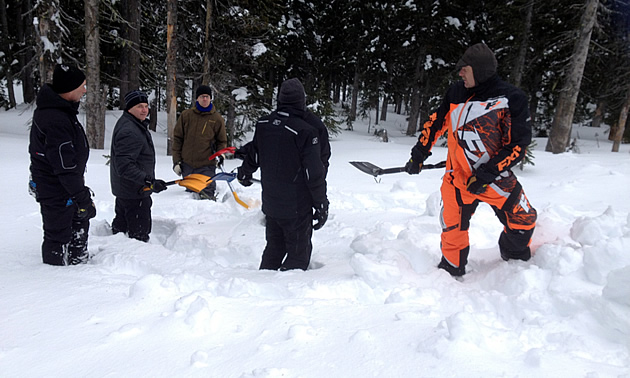
4. The quality of your avalanche shovel
Goal: Quality gear that stands up to dense avalanche debris.
Challenge: Gear that looks good in the store doesn’t always stand up to the task.
Opportunity: Quality avalanche shovels often have heat-treated metal alloy blades with solidly manufactured corners. Strong corners are required when chipping dense snow out of the side walls. Blades with a flat top allow rescuers to use their boots for more downward force. Also check the quality of the welds, shaft material and fastening systems on your shovel.
5. The size and shape of your avalanche shovel
Goal: Ergonomic gear saves rescuer time and energy.
Challenge: Small, lightweight gear costs less and fits well in the pack but may lead to poor shovelling form and require more energy to move an equal amount of snow.
Opportunity: Choose shovels with standard-sized (larger) blades, D handles that are comfortable with your gloves or mitts on, and longer, telescoping shafts. Curved blades help to direct snow as we find that snow slips off the flatter-shaped blades. Blades with serrated edges cut well, but guard the sharp edge to protect your gear when shoving them back in your pack.
Does your riding group work like a well-oiled machine and do members of the group carry gear to be proud of?
A refresher of your AST training or a Companion Rescue Course are great opportunities for instructors to highlight challenges and opportunities affecting your group’s performance. Check out Zac Tracs website for a full listing of classes in Western Canada.
