Snowmobile customization has become a popular practice for today’s rider. Riders want their machine to be unique, a reflection of their personality. Many choose to install a snowmobile wrap on their shred mobile.
Providing more than just a fancy look, snowmobile wraps provide extra protection for plastics, increased snow shedding, especially when installed on the tunnel, and can spruce up tired looking machines.
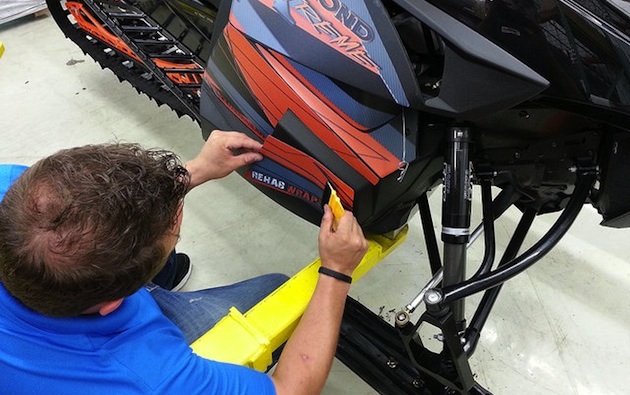
Here is a look at the how-tos with the help of Jesse Hopkins from Rehab Wraps.
Choosing a supplier
With so many companies to choose from, it can be a daunting task to narrow it down to just one. Choose a company that has not only years of experience, but offers a variety of templates and design options. Rehab Wraps has over 31 chassis templates, which can equate to savings if you have a machine that may not be the most recent. Some companies will charge an extra design fee if your chassis is not currently offered in their selection. Be sure that the company is familiar with the sport and the demands of winter conditions.
Snowmobile wraps require a special type of vinyl and adhesive that differs greatly from the products used for trucks, cars or summer toys. Customer service is a must, especially if you are midway through your wrap and have questions. Your company should be able to provide personalized attention to help you install your wrap with success. The little extras such as adhesive and installation tools are another perk provided by quality companies.
Installation tools and tips
Be sure to have your snowmobile in a warm garage at room temperature. This will facilitate the entire process, helping to remove decals easily and will allow your decals to fully set on the machine to ensure longevity.
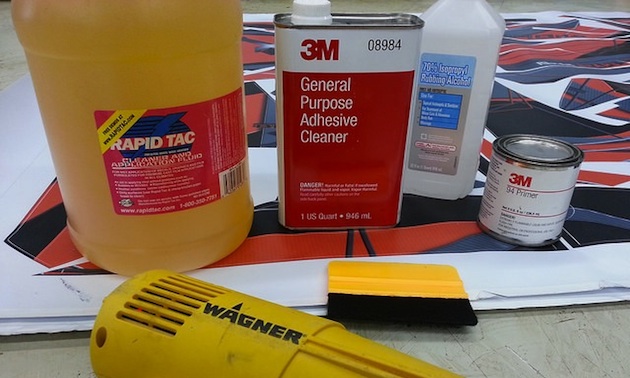
- Heat gun: Using a heat gun to warm the surface of your snowmobile, gently remove the decals that are on the snowmobile. The warmth from the heat gun will loosen the adhesive glues used on the existing decals, simplifying the entire process.
- Adhesive remover: Once you’ve removed all pre-existing decals, use adhesive remover to rid the machine of glue and other matter still remaining on the machine. Be diligent and take your time.
- Rubbing alcohol: Once you’ve used the adhesive remover, go over the machine once again with rubbing alcohol to get rid of dirt, grime and oils left over from your hands.
- Adhesive primer: Apply an adhesive primer such as Primer 94 on all of the low energy plastics. Low energy plastics are the dull or molded plastics such as the side panels and gas tank. This process further prepares the surface for adhesion.
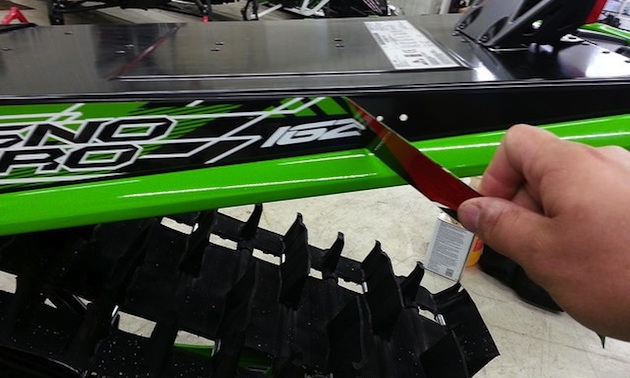
- Cut out and placement: Most wraps will come with the decals precut, with the mounting paper behind them. This process is quite like a jigsaw puzzle. Fully cut out each piece and identify its appropriate location. Some will use clear tape to temporarily place the pieces and familiarize the installer with the specific location.
More tips
For first timers, Hopkins recommends a wet install using a Rapid Tac type product, which allows for more time to place the decal in the exact location needed. This is important when continuity of design is required, allowing lines to be matched up to create the perfect flow of the design. Squirt the Rapid Tac on and apply the first decal, starting with the centre of the hood. This will allow for a more symmetrical application as you match up each piece from the inside out. If you encounter a bubble in the decal, with Rapid Tac you can use a pin and poke a small hole to remove the air, allowing for perfect adhesion and a smooth appearance.
A dry install skips the Rapid Tac process and goes right into decal placement after the Primer 94 has been applied. Much like marriage, once you’ve placed that decal you are committed to that placement.
The decals are pressure sensitive, meaning with pressure they will stick. Most kits will come with a felt edge squeegee to smooth the decal into place. The palm of your hand also works well to smooth the decal, allowing for precise application.
Using your heat gun, squeegee or palm from the inside out, apply firm but careful pressure, working towards the outer edge of the decal. Take extra care with the outer edges of each decal, because moisture can get in if the edges are not completely adhered to the machine, causing peeling and removal when out and about on your adventures.
Piece by piece apply each decal, taking time to step back and analyze each piece for symmetry and continuity. Do not rush. The quality of the wrap is only as good as the install, so if you need to take breaks, do so. A rushed or hurried application will most certainly result in dissatisfaction later on.
Allow your wrap to cure for at least eight hours in a warm and dry location, even if you are itching to get out on the snow to try it out.